I'd meant to post this yesterday, but DH surprised me and took me to a Pre-4th party (with fireworks and everything), so I never got around to writing this post. I am very excited to share this tutorial with you, though, so I do hope you'll forgive the tardiness!
 |
| The newest addition to my plush-making adventures |
A year ago, I decided to make a stuffed animal for my sister on her birthday (yes, she's an adult, but even us adults like something cute once in a while). I made a little giraffe, as it's her absolute favorite animal, and it stands proudly on her little worktable in her room now. The difficult part -- other than finding a nice pattern that wasn't too child-ish -- was figuring out how and in what order to sew all the pieces together. I'd never made a stuffed animal before! Recently I've been getting requests to make plushies for friends again (a horse, this time), so I decided I'd photograph the process and share it, to make your lives a little easier, too.
For this tutorial, I'm using a pattern that I modified from the original giraffe that I made for my sister. I shortened the neck and legs, and lengthened the mane (and left the horns off entirely). You can use your own pattern (as long as the pattern pieces are similar to mine in general) or find another online. The qualifications are: main body piece, leg/inner body gusset, hoof/foot bottoms, and ear pieces. That's all, and most patterns fit these qualifications!
 |
| My modified pattern |
Cut out the pattern pieces as follows: 2 main bodies, 2 inner legs/bodies, 4 hoof pieces, 4 ear pieces, and a 3" x 20" piece for the mane. Make sure that the body and leg pieces are cut right sides together so the material's right side will be outside when we sew it together later. I repurposed some old jeans for this project, as they make some sturdy toys. Great for little kids! I also pieced some scraps together for the mane, because I wanted it colorful. Remember the rainbow apron from last week? This horse is going to the same home, so I made it to match!
 |
| All the pieces cut out |
First things first, we want to sew together the inner leg pieces, leaving a 2" gap in the middle. The gap is so we can turn the horse right side out later. Line up the pieces right sides together and sew with a 1/4" seam allowance along the top edge.
 |
| My gap pretty much lines up with the insides of the legs |
 |
| 1/4" seam allowance |
Here's what those inner pieces should look like now. I'm sorry for how faint the white thread is on the inside of the jeans material, hopefully you can still see it well enough to see the gap!
 |
| My gap was actually a bit small... the smaller it is, the harder it will be to turn later |
Now pin the inner legs to the main body pieces. The way I did this is to lay the main body pieces right sides together and then fold up the top legs to lay the inner legs between them. Make sure the inner legs and main body pieces go together with the right sides, as well. In other words, you want to see the seam of the inner leg pieces on the outside when you pin this together. I may have some experience doing it the wrong way. Luckily that was still back when I was trying to modify the pattern.
 |
| I pinned the top portion as well, just to keep everything lined up |
Sew the legs carefully. There's three seams you'll be making (on each side): backside to bottom of back leg, bottom of back leg to bottom of front leg, and bottom of front leg to front. The inside is the easiest of these, and pretty self-explanatory. The outside pieces are a bit more tricky. You'll want to sew from the bottom of the legs up to the point where the inner leg pieces come to a seam. See my photos for clarification, and please leave a comment if anything's still unclear! Leave bottoms of the legs open to insert the hoof pieces later.
 |
| Seams on each side |
Note that I left everything upward of the inner leg seam open. So, just sew up to the inner leg seams. This is so we can add the mane and tail in a bit. See below:
 |
| Top left open |
Now a bit about the mane. I pieced together my strip for the mane at the very beginning of this tutorial. You just need a piece that's 3" wide by 20" long. Seem a bit long for a little mane on that pattern? Not to worry! We'll be gathering it to make it nice and ruffle-y and the correct length.
 |
| Folded over and pressed once, right sides out |
Once you've folded your original strip in half (right sides out) and pressed them, go ahead and sew two lines down the length of the strip. Make sure you have your stitch length set as long as possible, and leave a good gap between the two lines.
 |
| Two long lines of stitches |
Now make a knot with all 4 thread tails at one end of the fabric strip. At the other side, choose two threads (either the two top threads or the two bottom threads) and start pulling them evenly. This will make the gather we're looking for. Once you've gathered to your satisfaction, knot the rest of the threads together and we're ready to pin the mane to the body!
 |
| Gathered mane fabric |
I started by pinning the middle of the fabric strip to roughly the middle of the neck of my pattern (note that the mane will be sandwiched between the right sides of the main body pieces). Then I worked my way up to the top of the head, pinning as I went, keeping the rough edge of the gathered fabric to the edge of the main body piece. I wanted a bit of a forelock on my horse, so I curved the mane strip out at about the middle of the forehead. Repeat the process for the lower portion of the mane, ending at just below the shoulder (withers, for us horse folk out there).
 |
| Mane all pinned down |
Step back from the main horse pieces now to make your tail (we want to pin that in, too, before we sew everything shut). I used embroidery thread, but it's just as easy to cut some fabric in a nice tail shape, sew it together, add some stuffing, and pin it to the horse. If you are using embroidery thread, cut it about 4" longer than you really want it.
 |
| Rainbow of embroidery thread |
Make a knot at one end, and don't worry about uneven threads at the other. We'll be trimming those at the very end.
 |
| I didn't want it to look too organized, clearly |
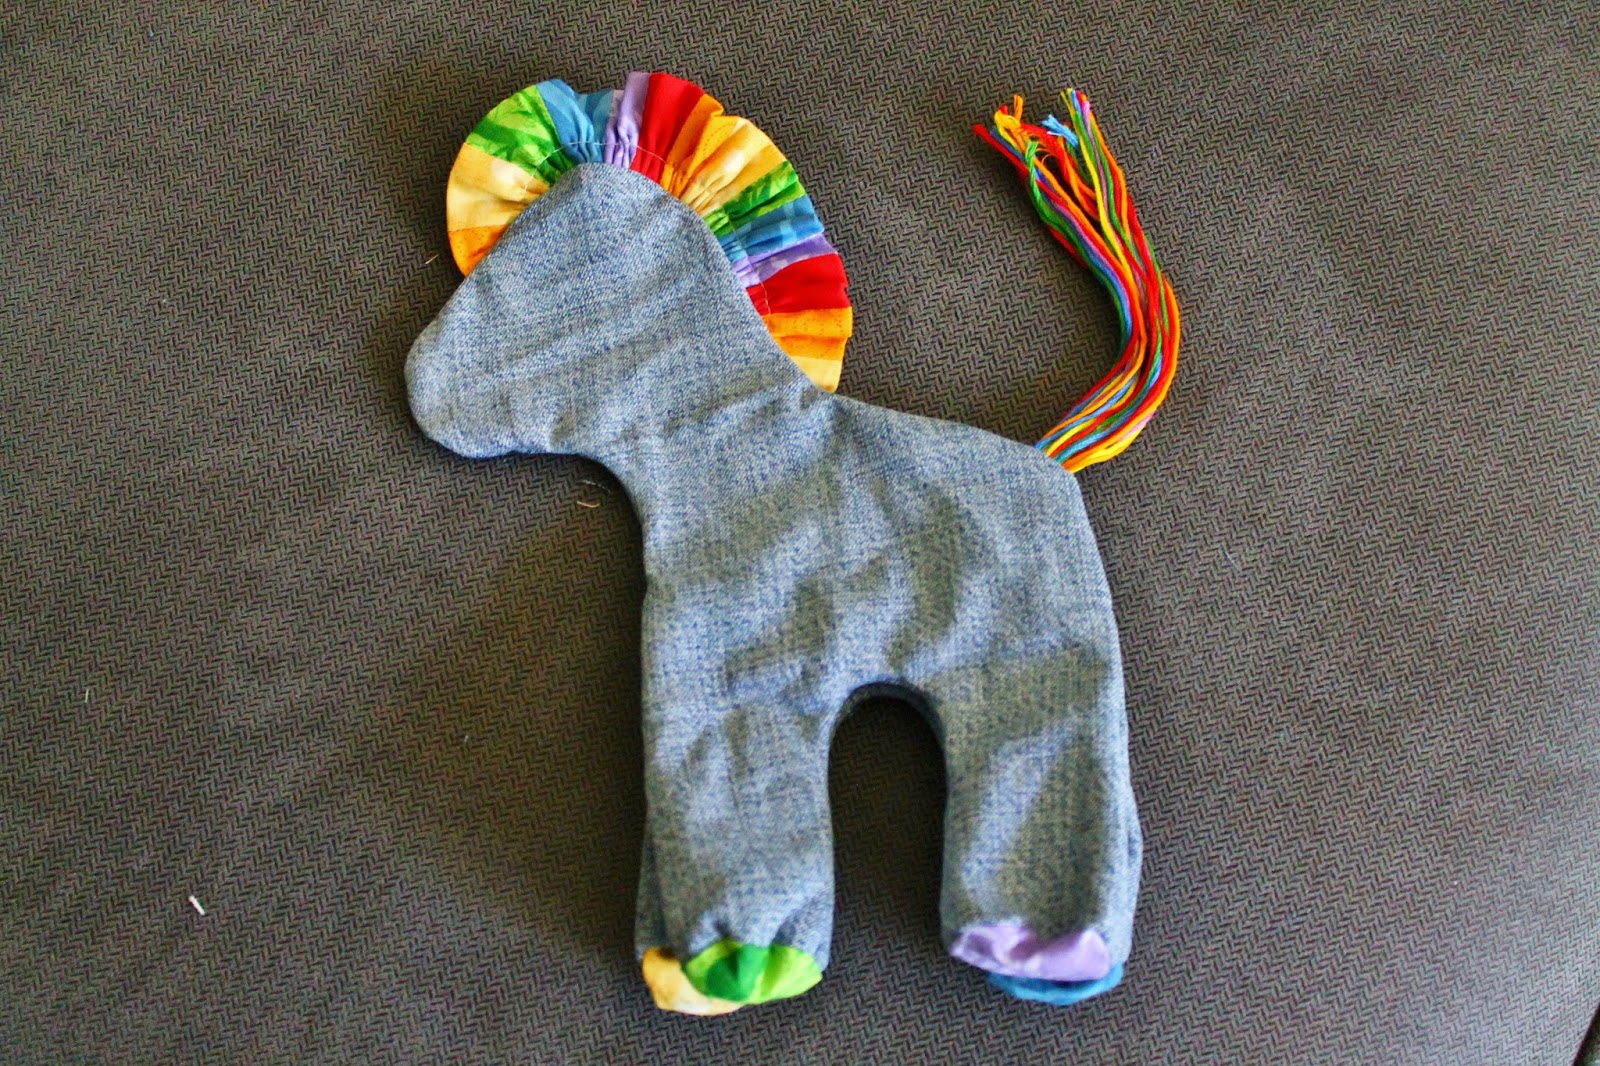
Pin the tail onto the main body piece somewhere along the rump. That bit's up to personal preference. Mine's right at the middle of the curve.
 |
| Tail sandwiched between main body pieces |
Pin the rest of the main body pieces together, and then sew from the inner leg seam all the way around the top to the second inner leg seam.
 |
| All pinned up |
Use a 1/4" seam allowance again for sewing around the main body. If you'd like to reinforce the seams at the mane and tail once you've sewn across the top once, go back and sew an 1/8" seam allowance on just those parts.
 |
| Start at the join of the inner leg seam and main body |
Clip the parts of the mane that are sticking up past the regular seam allowance now, but leave the tail!
 |
| Mane clipped |
Next we'll be adding the bottoms of the hooves. Take your hoof piece and mark 4 equally distanced points. I fold mine to make it even.
 |
| Pins at each "corner" |
Pin the hoof piece inside the leg tubes with the right side down (or into the leg tube). Use the 4 points to space the circle evenly into the tube.
 |
| Even spacing makes sewing much easier |
Use a zipper foot or similar for this bit, as it's just easier to maneuver.
 |
| Zipper foot |
Go around the hoof at about 1/4" seam allowance if you can. I eyeballed mine, and the seam allowance wasn't exactly perfect. But hey, it's the bottom of the hoof. Not a whole lot of attention there anyway, probably.
 |
| Needle set to the middle |
The horse now looks like it's anorexic and been stung in the feet several times. But not to worry, the stuffing is coming next! Just clip some notches into the curved areas before you turn it so that the curves don't look all funny when it's right side out.
 |
| All four feet sewn in |
Now comes the trickiest fun part: turning! If your gap between the inner leg pieces was a bit small, like mine, do yourself a favor and reinforce those seam ends now. I didn't, and mine broke halfway through turning. I covered it up when I stitched it closed, but it made for some unhappy complications. I started turning my horse right side out with the head first. Then the front legs, then the back. just get it all turned through that gap at first. You can make it neat after it's through.
 |
| First half turned right side out |
Once it's all right side out, take a big knitting needle or similar device and poke all around the little horse to get the angles all turned out.
 |
| Everything more or less neat |
See that ugly stitching line by the mane? That's leftovers from gathering. You can pull those bits out now (they should have been made loose by clipping the mane along the seam allowance earlier). Use a seam ripper to ease the thread out if it's giving you trouble.
 |
| Gathering thread still visible |
 |
| Gathering threads pulled out |
Now we can get to stuffing. I used Morning Glory Cluster Stuff because I had some left over from other projects, plus I think it feels the best in stuffed animals because it stays soft and doesn't clump. But feel free to use whatever you have on hand.
 |
| Front half stuffed |
Once you've added as much stuffing as you like, use a ladder stitch to sew the gap between the inner legs shut. I may have added a little too much stuffing, as it was pretty hard for me to sew this bit as evenly as I would have liked. Oh well, such is life.
 |
| Ladder stitch |
Part of the reason I left the gap here (as opposed to the top between the mane and tail) is because it won't be very visible, so it doesn't have to be as neat. Would I like it to be perfect? Yes. Do I expect my hand sewing to get dramatically more precise overnight? Sadly, no.
 |
| Closing up the ladder stitch |
At this point our little plushie is still missing his ears (so glad he didn't hear me cursing while I stuck myself with the needle trying to sew him shut). So, let's go ahead and make those now! Put the ear pieces together in pairs, right sides together.
 |
| One jean ear piece, one cotton, each |
Sew around the ear, leaving a gap at the bottom to turn.
 |
| I know the white thread is hard to see... so sorry |
Now clip some corners off to make everything that much neater once we turn it.
 |
| Corners clipped |
I pressed mine once I turned them right sides out, and then pressed the bottom corners to the middle. They look much more "ear"-like to me now.
 |
| Pressed |
Sew the bottom together, just to make sure everything stays in place. This step is optional, since we'll be sewing the ear to the head next, but I like to have things nice and secure.
 |
| Bottom sewn shut |
Mark your ear position on the head (I just made a line with a blue pen, but you could use chalk or just eyeball it). Now use that ladder stitch again to fasten the ear to the head. I stitched each side of the ear separately to the head, making a thin oval around my line, but you can do it all at once if you'd rather.
 |
| Ladder stitching again |
And there's your ear! Or, your plushie's ear, anyway. Repeat the process on the other side, and your horse is pretty much finished!
 |
| Much neater than the gap earlier |
Admire your handiwork, give it to a friend, or let it sit on your dresser and keep you company on flights (no joke, I have a little sheep that always comes with me when I travel). Oh, and trim that tail now, unless you like it all unruly!
 |
| I'm pretty pleased with this plushie |
 |
| That tail... |
If there's anything I was unclear on, or if you have any questions, feel free to leave a comment and I'll answer whatever I've left out! I'd also love to see what you come up with from this tutorial, the possibilities are just about endless after all!
Happy Sewing,
Lea


No comments:
Post a Comment