Hurray! It's the final stretch of this fantastic stash-busting project!
Alright, if you felt a little overloaded from last time, let me preface by saying this one will be shorter. Although still pretty photo-heavy. Enjoy!
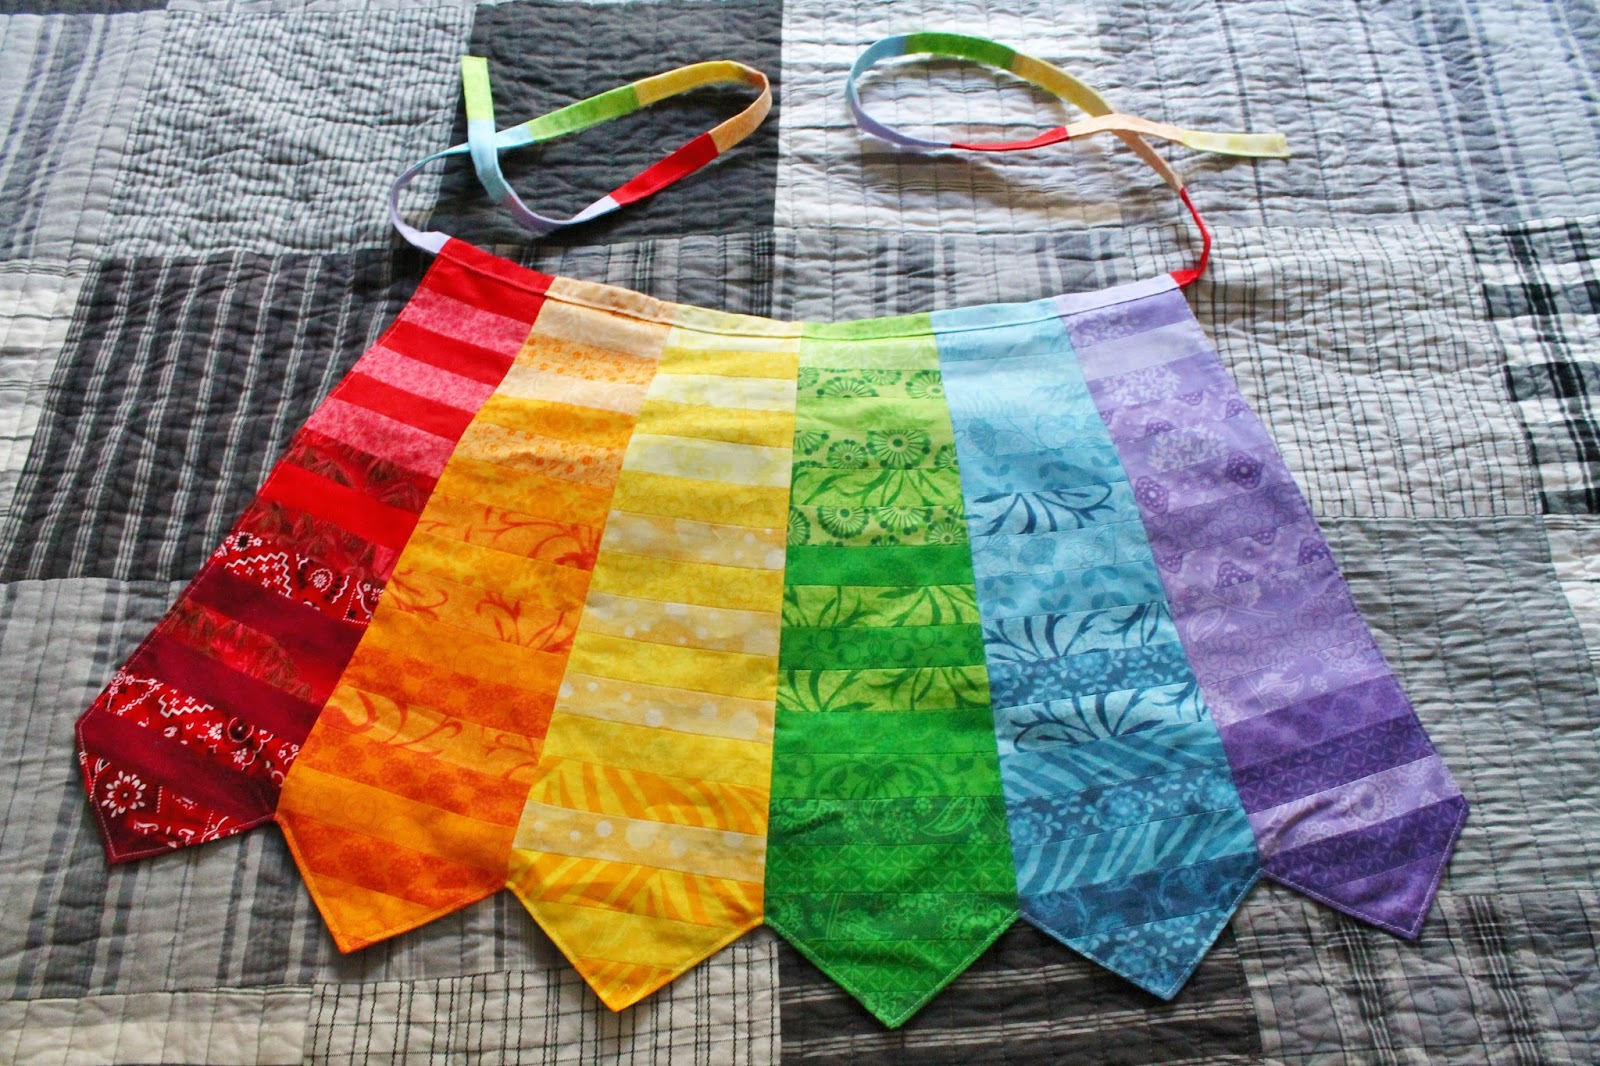
Starting with the back apron pieces, line them up so that they will coordinate with your front pieces. So, if you did a rainbow like me and went in order from left to right with purple, blue, green, yellow, orange, and red? Your back pieces should be arranged (right side up) from left to right as red, orange, yellow, green, blue, and purple. When you connect them, the purple will be on the backside of purple. and red on the backside of red. Sound pretty obvious? Guess who had to unpick a whole bunch of stitches to remember this lesson.
 |
| Pin pieces together at the corners first, then add pins in between |
 |
| 1/4" seam allowance just like the front pieces |
This is what I meant by coordinating. If the backside of the apron was right side up, it would look opposite the topside. But you want the seams hidden inside, so you want the apron to fit together right sides together and coordinate (if you don't have a strict color scheme, this obviously doesn't matter).
 |
| topside right side up, and backside wrong side up |
Now turn the backside of the apron right side up and lay the topside on top so that the right sides are together. Pin the corners and "V"s of the chevrons first (make sure everything is laying nice and flat... my backside was a little warped on the outer edge, so I just smoothed it out and followed the top of the apron's edge). Next, pin the upper corners and down the sides. Leave the top open so you can turn it inside out later.
 |
| Maybe you can tell the purple edge doesn't look quite as neat as the others, just make sure the inner seams match up |
Starting at the right upper corner, start sewing around the edge of the apron, using a 1/4" seam allowance as before. That odd little warped section I had trouble pinning? I followed the topside edge as a guide for the seam allowance.
 |
| Sewing the outside of the apron |
When you get to the corners, sew into the corner with a 1/4" seam allowance, lift your presser foot, adjust the fabric, then continue sewing the 1/4" seam allowance. Make sure the seams are all neatly matched before sewing over them.
 |
| Going around the corners |
Clip the corners of the points once you've sewn around the apron from one side to the other (remember the top stays open).
 |
| Unclipped |
 |
| Clipped |
The "V"s need a notch just like we did with the chevrons earlier. As close as you can get.
 |
| Right up to the stitching line |
Now turn the apron right side out (use a knitting needle, screw driver, or whatever other pointy object you have in hand to push out all the little corners). I pressed the edges, because I think it makes the edges look neater when I add the topstitching. Then take it back to the machine and go around one more time, this time with an 1/8" seam allowance. This is just topstitching to make it look pretty, but it helps the edges stay in place, too.
 |
| 1/8" seam allowance for topstitching |
 |
| Going around the points |
Give it one good press if you didn't earlier and set it away to work on the strap for a bit.
 |
| Top is still open |
 |
| Topstitching looking good |
Arrange your strap pieces so they coordinate with the apron. The center pieces of my strap match the pattern of the apron.
 |
| Strap pieces are overlapped, I just needed to see the order |
Sew the strap pieces together along the short edges, right sides together, with a 1/4" seam allowance.
 |
| Just keep joining them together... it'll be a long strap |
Press all the seams open.
 |
| I cut all the little thready tail-ends off the sides, too |
Fold the strap in half and press again.
 |
| Folded and pressed |
Now open the strap and fold in the sides to meet at the middle (the fold is basically the line to follow). Then fold it on the original fold again, press, and (in my case, anyway) starch. Basically we're making double-fold bias tape.
 |
| Following the fold lines |
Pin the strap to the apron, catching the raw edges along the top in the fold of the bias tape strap. Make sure all the seams match up neatly. Also, fold the raw edges at the very ends in.
 |
| I started pinning in the middle and then worked my way to the outside. |
 |
| Lining up seams |
Sew along the open edges of the strap using an 1/8" seam allowance. You're topstitching and catching the raw edges in between at the same time.
 |
| 1/8" seam allowance |
 |
| Note: The raw edge of the apron is as far into the bias tape as I could get it |
Ta-da! Now you have a beautiful, sturdy apron with plenty of pockets for collecting fresh eggs every morning... or, you know, anything else you need extra pockets for.
 |
| Front of the finished apron |
 |
| Back of the finished apron |
Well, there it is. I hope you enjoyed my first tutorial, and had a great time making an apron that can be used for pretty much anything (I'm thinking it'd be great for gardening, too, with space for seed packets and tools). If you're like me, you even managed to cut down your stash a bit (although, if you're like me, that doesn't really mean much... there's still way too much). Please leave a comment if there are any unanswered questions or if I bored you half to death with the overabundance of photos and explanations!
Happy Sewing,
Lea


No comments:
Post a Comment