Welcome to a very special tutorial on Straight Eight!
 |
| The beginnings of a wonderful chess set! |
If you guessed that I'm making a chess set from yesterday's post, congratulations! A checker board would have also been correct, I suppose. Yes, I know it's not sewing, but you know what? I haven't played chess in ages and that has to change! What with all the apps and games for phones and tablets and computers, we haven't had a proper board game in this apartment, and I think that's a shame. So, since we've decided we want to do a game night every week, I set about to make a chess set. I know I could have just gone to the store and bought one, but I haven't seen a pretty set that I liked for less than $70. And we're not swimming in money for games (although I guess Xbox games cost about that much new... huh).
We just so happened to have an old TV tray table that hasn't been used much. You can use any piece of wood that's big enough for the size board you want though. And since I planned to finish the board with some kind of sealer or polyurethane, it's not like we couldn't still use it as a TV tray table once it had the board on it. Just put away the chess pieces first!
So, starting with the supplies...
Supplies:
Wooden Surface (table, tray, board)
Sandpaper (100-220 grit at least)
Woodburning Tool
Stain
Finish
Painter's Tape
Ruler
Pen
 |
| Old TV tray tables make great game boards |
Now, a quick word about woodburning. Firstly, it's not the only way to make a chess set on a wooden board. You could just use paints/stains, or cut square pieces of paper and Mod Podge them to the surface. But I like the look of woodburning, and I enjoy the process (except for sanding, but who likes that anyway?). It may not look perfectly neat, but that's part of the charm, I think.
 |
| Pyrography on my board |
So, start by deciding how big of a chess board you want to end up with. This may be limited by the wood you have to work with, but you'd be amazed at how fun even a small chess set can be (given the pieces are sized accordingly). Our tray table is 14 inches wide and about 18 inches long, so I was limited to the narrowest portion. You also don't necessarily want to take up the entire board, because you'll want a little space for the "taken" pieces to go once you start playing. Our finished board is 12 inches by 12 inches, which gives us 1-and-a-half inch squares. I'm very happy with that size.
Once you've got your plan, sand the wooden surface you'll be woodburning. Start with a rough grit and work your way up until the wood is super smooth. With the prep done, it's time to start marking the board! Use a ballpoint pen or other non-smudge-able, non-bleeding marking tool. You'll woodburn over these lines later anyway, but try to keep them light and thin. Find the very center of your surface and make a dot. Then make horizontal and vertical center lines, making sure the very center is on the dot you just made. Continue to "map" out your chess board section by section, working from the middle out.
 |
| I used a quilting ruler to make sure I squared everything up neatly |
When you've got all the lines drawn on the board, use a woodburning tool to follow each line. I used the cone-tip on my old
Walnut Hollow Woodburning Pen. You can use the universal tip, too, it just gives a sharper, cut-looking line. The pen tool works great for easy projects like this, and as much as I love my more expensive pyrography tools (with variable temperature settings), I didn't want to use them on this table. Firstly, because you don't need a fancy tool for this, and secondly, because there were some places that had been filled with a glue/wood particle mixture on this surface. I didn't want to ruin my good tips on those.
 |
| The initial grid |
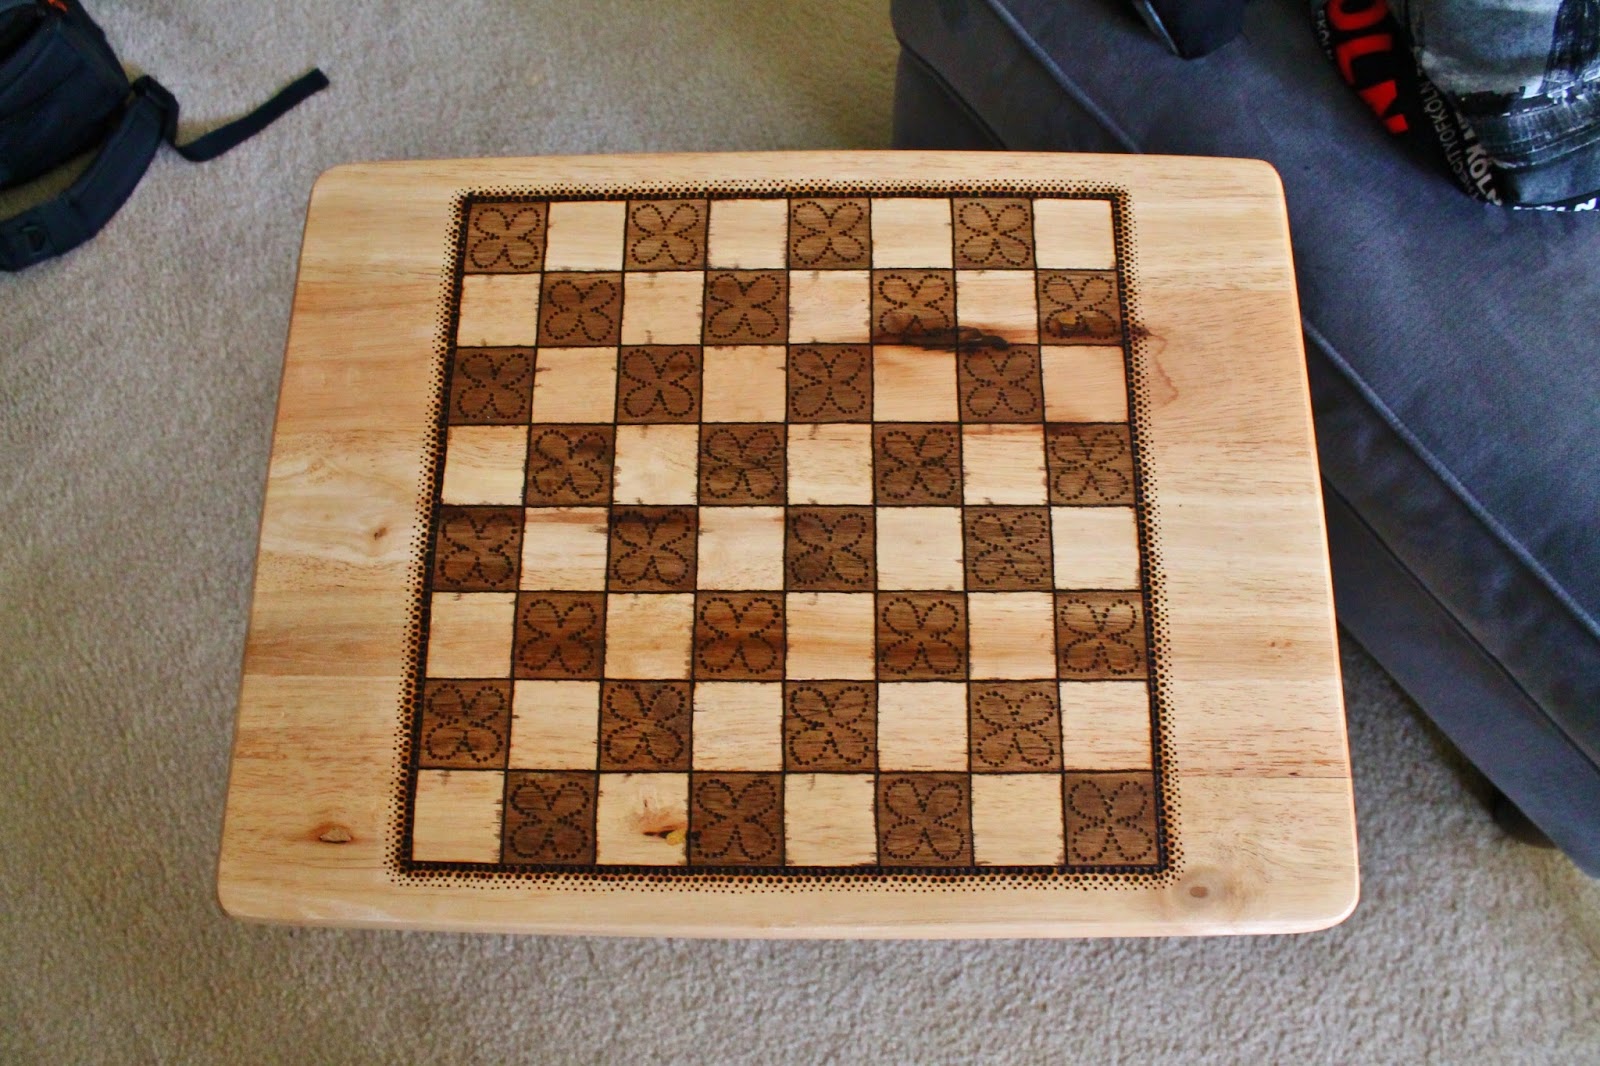
Decide on decorative touches at this point. I'll be staining the "dark" squares, but I wanted a little more flair than just stain. I found a four-leaf clover type pattern on a really pretty chessboard on Amazon.com while I was doing my research for this project, so I decided to go with that sort of design. Only in the dark squares though, I want the light squares to really stand out. I also added dots around the sides of the "board". It makes the whole thing stand out a bit more. Get creative here, this is where you really make the chess set yours! Also, go over it very lightly with a super high grit sandpaper when you're done just to smooth out any rough edges or little bits sticking up.
 |
| All the designs burned on the board |
Now that your hand is probably aching and sore from all the woodburning, it's time to prepare the surface for the stain. Warning: this may take a while. Using painter's tape (or something that won't leave residue on the wood when you pull it off), go once around the whole "board". Make sure to really get in those burn lines. You don't want to leave even a bit of an edge for the stain to get under where you don't want it. Trust me. Then start taping the squares off. I worked in a vertical pattern first, cutting at the horizontal burned lines with a box cutter (lightly, so as not to gouge the wood). I basically taped off every other row, vertically, then turned the table and repeated the process to get the other half. See below for illustration.
 |
| Press those edges to be extra neat. |
The stain and finish I used were Minwax Wood Finish in "Special Walnut 224" and Minwax Fast-Drying Polyurethane in "Clear Satin". The stain is dark, but not super dark (I'm glad DH convinced me to go with this rather than the regular "Walnut"), and the finish won't be super shiny. Lacquer would look good if you have a really cool wood grain to show off though.
 |
| Finish and stain |
Apply the stain as directed. And try to color inside the squares, rather than swab it all over like I did. This will be an example of do as I say, not as I do. You'll see why later.
 |
| Look at how nicely it's going to contrast! |
Once one coat has been applied, let it sit for a bit and decide if it needs another coat. Some of my squares weren't picking up the stain very well, and I ended up giving them three coats to match the rest of the stained squares. Just get it as even as possible.
 |
| All the "dark" squares stained |
Once the stain has set and is dry, peel off the painter's tape. Hopefully you did as I said, not as I did, and there aren't too many spills of the stain to the "white" squares. Just about every light square on my board has a few spots where the stain seeped through. I think swabbing the stain across like I did is the cause. I went over and lightly sanded those areas a little, so they lightened up a bit, but you can still see them pretty clearly. Oh well. It's a home-made chess board, and I don't plan on selling it, so I don't really care too much. I can still play!
 |
| Staining complete |
Complete the chess board by applying the finish as directed. I gave mine about 3 coats of finish, waited 3 days, sanded it lightly with superfine sandpaper, and gave it one more coat. Perfect. Nice and smooth with a satin-y finish.
Enjoy your new chess (or checkers) board! You can either buy pieces to use on it, or stick around and let me show you how I made a matching set for this board! And, in light of this mini-series...
Happy Crafting,
Lea


No comments:
Post a Comment